
Table of contents
Before We Start (What’s This All About?)
You’re here to learn about MAC Address Tables — not just to pass a test, but to actually understand what’s happening behind the scenes.
The best way to do that? Start with the big picture — then work your way down to the commands.
Let’s answer 3 critical questions before we touch the CLI.
What is a MAC Address Table?
Every switch has a guest list that tracks which devices are connected to which ports. This list is called the MAC Address Table.
Think of it like the front desk at a large hotel.
- Every time a new guest (device) checks in, the receptionist records:
- Guest name (MAC address)
- Room number (port number)
When a delivery arrives for a guest (a data frame), the receptionist checks the guest list and knows exactly which room to send the package to.
But what if there was no guest list at all?
The receptionist would have to walk to every single room, knock on every door, and ask, “Does this package belong to you?”
In a hotel with hundreds of rooms, this would be a complete disaster — wasting time and slowing everything down.
That’s exactly what happens when a switch doesn’t have a MAC address table.
Why does it matter?
Without a MAC address table, a switch has no idea where devices are located.
- It has to flood every frame to every port, just like the receptionist visiting every room.
- This wastes bandwidth and slows the whole network down.
With a complete and accurate MAC address table, the switch can forward frames directly to the correct port, no guessing, no wasted traffic.
This is how Ethernet networks stay fast and efficient.
Where do you see this in real life?
- Office networks: Every laptop, phone, and printer gets logged into the switch’s MAC table.
- Data centers: Thousands of servers talking to each other rely on accurate MAC learning.
- Home networks: Your smart TV, gaming console, and even your smart fridge are all logged into your home router’s MAC table (because your router acts like a switch too).
Why This Lab Matters (And Why You Should Care)
Reading about MAC tables is one thing — but seeing them build live, frame by frame is what makes it click.
This lab gives you that experience.
You’ll set up a multi-switch network, send real traffic across it, and watch as each switch learns exactly which device lives on which port.
By the end of this lab, you’ll:
- Understand how switches dynamically build and update MAC tables
- Confidently explain this process in interviews
- Know how to troubleshoot real switching issues in live networks
If you want to think like a network engineer, this is where you start.
Lab Summary
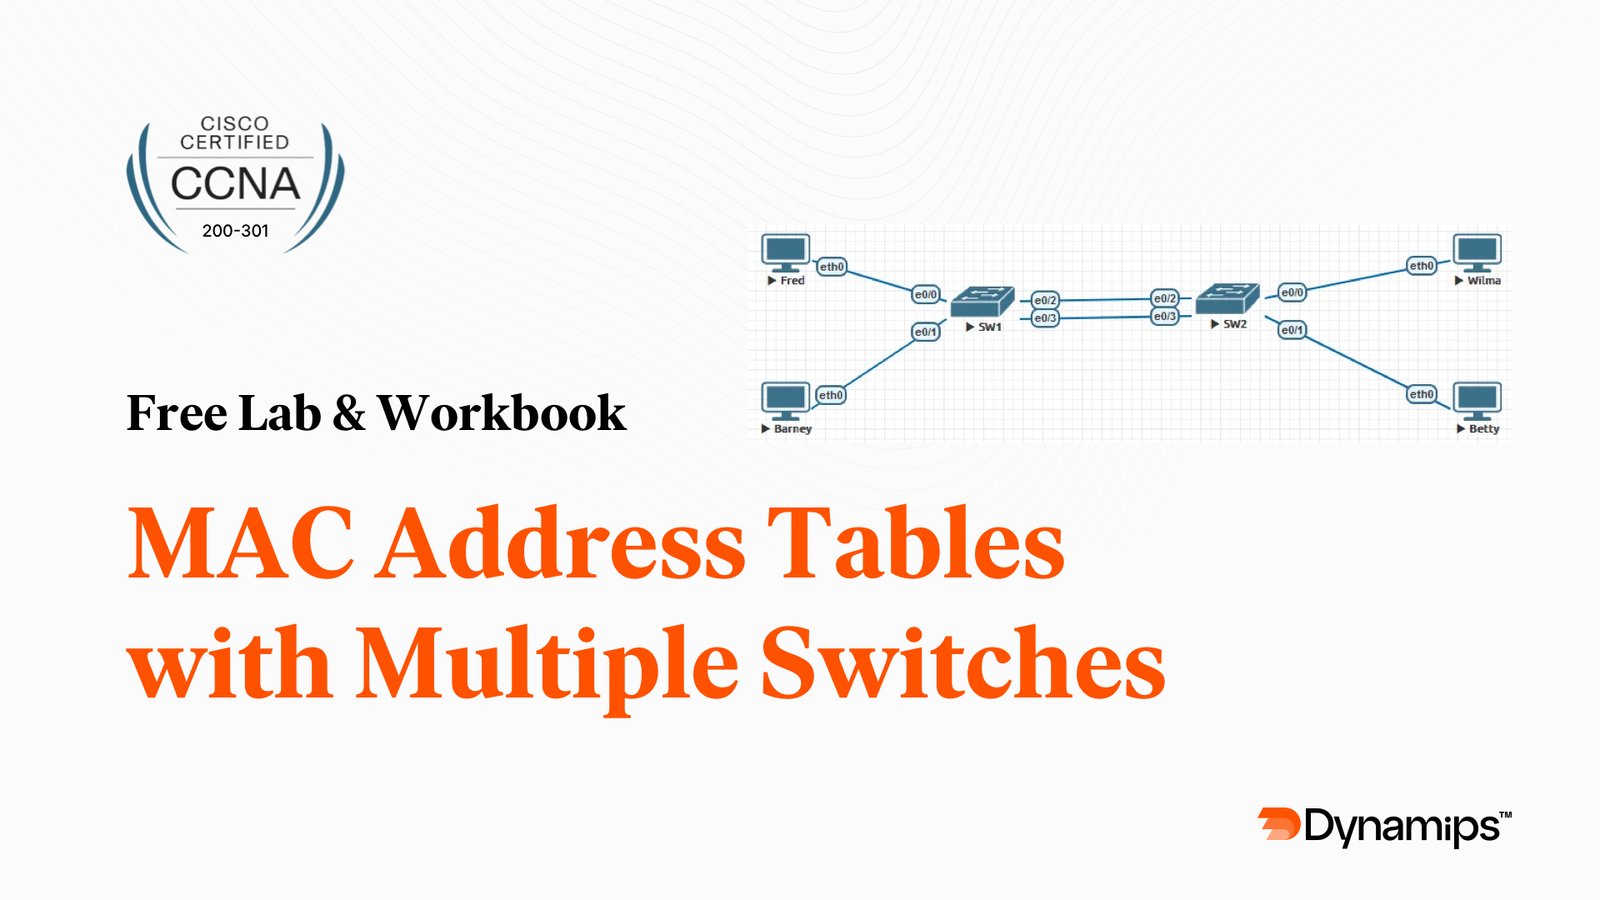
- Lab Name: MAC Address Tables with Multiple Switches
- Lab Difficulty: Intermediate
- Approximate Time: 45–60 minutes
- Preferred Image: iol l2 or vios-l2
- Book Reference: CCNA 200-301 Official Cert Guide, Volume 1 (2nd Edition) – Cisco Press
- Lab on: Chapter 5: MAC Address Tables with Multiple Switches
- Figure: 5-10 (Two-Switch Topology Example), Example 5-8 (The MAC Address Table on Two Switches)
What You’ll Set Up
- Two Cisco Layer 2 switches (SW1 & SW2)
- Four PCs connected across both switches
- Live traffic to trigger MAC learning across the switches
This mirrors how real networks in offices and data centers work — devices connect to different switches, and those switches exchange traffic.
Topology Diagram
Below is the topology diagram for this lab setup:
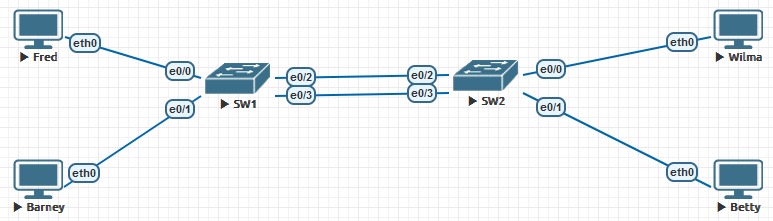
Device Connections
| Device | Connected To | Port |
|---|---|---|
| Fred (PC1) | SW1 | e0/0 |
| Barney (PC2) | SW1 | e0/1 |
| Wilma (PC3) | SW2 | e0/0 |
| Betty (PC4) | SW2 | e0/1 |
| SW1 | SW2 | e0/2 to e0/2, e0/3 to e0/3 |
Why This Step? This is a classic multi-switch layout, just like two floors in a hotel, each with its own reception desk, but both connected to the same hotel network.
Prerequisites
You’ll need:
- EVE-NG running.
- 2 iol l2 or vios-l2 switch images.
- 4 vPCS devices for Fred, Barney, Wilma, and Betty.
- Basic understanding of MAC address tables and frame forwarding.
Implementation Steps
Step 1: Set Up the Topology
- Add the following devices in EVE-NG:
- Two Layer 2 Switches (SW1 and SW2).
- Four vPCS for Fred, Barney, Wilma, and Betty.
- Connect devices as follows:
- Fred → SW1 E0/0
- Barney → SW1 E0/1
- Wilma → SW2 E0/0
- Betty → SW2 FE0/1
- SW1 E0/2, E0/3 uplinked to SW2 E0/2, E0/3
Why This Step? This two-switch topology mimics how real LANs work in offices — users spread across multiple switches, but all part of the same network.
Step 2: Configure Switches
1. Configure SW1:
Switch>
Switch>enable
Switch#configure terminal
Switch(config)#hostname SW1
SW1(config)#interface range e0/0 - 1
SW1(config-if-range)#description Connected to Fred and Barney
SW1(config-if-range)interface range e0/2 - 3
SW1(config-if)#description Uplink to SW2
SW1(config-if)#exit
SW1(config)#
2. Configure SW2:
enable
configure terminal
hostname SW2
interface range e0/0 - 1
   description Connected to Wilma and Betty
interface range e0/2 - 3
   description Uplink from SW1
exit
Why This Step? Switches are layer 2 devices, so they rely entirely on port-to-MAC learning. Defining the correct port roles makes sure they’re ready to build accurate MAC tables.
Step 3: Configure the PCs
1. Assign PC IP address:
- Fred (PC1)
PCS> ip 192.168.1.1/24
Checking for duplicate address...
VPCS : 192.168.1.1 255.255.255.0

VPCS>
VPCS> set pcname Fred

Fred>- Barney (PC2)
PCS> ip 192.168.1.2/24
Checking for duplicate address...
VPCS : 192.168.1.1 255.255.255.0

VPCS>
VPCS> set pcname Barney

Barney>- Wilma (PC3)
PCS> ip 192.168.1.3/24
Checking for duplicate address...
VPCS : 192.168.1.1 255.255.255.0

VPCS>
VPCS> set pcname Wilma

Wilma>- Betty (PC4)
PCS> ip 192.168.1.4/24
Checking for duplicate address...
VPCS : 192.168.1.1 255.255.255.0

VPCS>
VPCS> set pcname Betty

Betty>
Why This Step? Without these IPs, the PCs can’t send traffic, and without traffic, the switches won’t learn any MAC addresses.
Step 4: Generate Traffic & Trigger MAC Learning
Example – Fred Pings Wilma
Fred> ping 192.168.1.3 The moment Fred sends that ping, SW1 learns Fred’s MAC address. When Wilma responds, SW2 learns Wilma’s MAC address.
Step 5: Verify MAC Tables on Both Switches
Check MAC Table on SW1
SW1# show mac address-table dynamicExpected Output:
- MAC 0050.7966.6805 (Fred) on E0/0
- MAC 0050.7966.6803 (Wilma) on E0/2
Check MAC Table on SW2
SW2# show mac address-table dynamicExpected Output:
- MAC 0050.7966.6803 (Wilma) on E0/0
- MAC 0050.7966.6805 (Fred) on E0/2
Why This Step? Each switch independently maintains its own MAC address table, even though they’re passing traffic between them. Seeing this behavior live is key to mastering Layer 2 switching.
Verification & Testing
- Ping tests between all devices.
- Check show mac address-table dynamic on both switches.
- Confirm MAC addresses match expected ports.
Troubleshooting Tips
- If MAC addresses are not appearing:
- Ensure all interfaces are enabled with no shutdown.
- Verify trunk ports between switches are operational.
- If traffic fails:
- Check the connectivity and correct cabling between devices and switches.
Key Commands
- Verify MAC Address Table:
- show mac address-table dynamic
- Activate Ports:
- interface <interface>
- no shutdown
- Clear MAC Table (Optional):
- clear mac address-table dynamic
Key Takeaways
- Every switch dynamically learns only the MAC addresses it needs.
- Multiple switches in the same LAN can independently build and maintain MAC tables.
- Switches only forward frames if they know where the destination MAC is.
Real-World Application
- Multi-switch LANs in offices, data centers, and campuses.
- Tracking which devices are connected where across multiple switches.
- Essential foundation for VLANs, STP, and advanced switching.
Common Pitfalls
- Forgetting to enable trunk ports.
- Forgetting no shutdown on uplink ports.
- Expecting MAC tables to fill without live traffic.
- Incorrectly cabling ports between switches.
Validation Checklist
- Both SW1 and SW2 dynamically learn MAC addresses.
- MAC address tables match the expected port mappings.
- Connectivity between all PCs is verified successfully.
Download This Lab’s Workbook & EVE-NG File
Want to save this lab for later? Download the PDF workbook and EVE-NG file right here:
Download Free Workbook & EVE-NG File (coming soon)
Want 130+ More Labs Like This (Free for 14 Days)?
This lab is just one of over 130 labs inside the CCNA Full Pack.
- All labs include step-by-step instructions.
- Pre-built EVE-NG files you can download instantly.
- 14 days free access — no risk.
