EVE-NG LAB Full Pack Installation

Note💡 — The OVA version of EVE-NG has been removed from their website, and only the ISO version is currently available. We recognize that using the OVA is the simplest method for installation on a virtualizer. Therefore, we have produced an OVA version from the ISO for your convenience. To access the download link, please click here: Download EVE-NG community OVA

How to install EVE-NG LAB Full Pack in VMware Workstation (short video)

How to import eve-ng lab?​

How to install EVE-NG Pack in ESXi (short video)

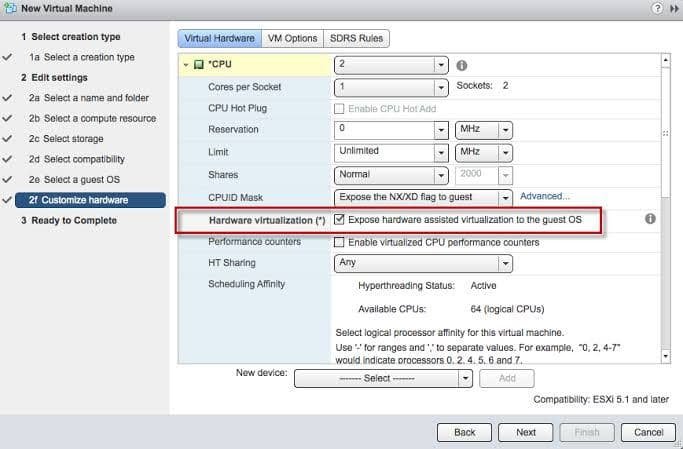
How to enable virtualization technology in ESXi EVE-NG VM

eve-ng virtualization

How to access the internet from EVE-NG LAB Full Pack nodes?

Tip —

Although you can use bridge or management network in eve-ng to let eve-ng nodes access the internet, we have managed cloud 1 in the eve-ng full pack to let access the internet from eve-ng nodes, and the allowed range is 192.168.13.0/24, and the default gateway is 192.168.13.1, which is the eve-ng cloud 1 (pnet1) interface. For more information, please watch the below video.

How to install EVE-NG LAB Full Pack on VMware Fusion MAC-OS?

How to Download EVE-NG images from EVE-NG Full Pack on your computer?

How to Upload new images into EVE-NG Full Pack?

How to Enable Virtualization on BIOS PC and EVE-NG VM

Note:

  • You must enable Virtualization to run Qemu Node on VM.  
  • You have to make sure Virtualization is enabled in your BIOS

How to disable Hyper-V in Windows 11 using Terminal commands. (hyper-v service is the main reason to block the virtualization technology on Windows 11)

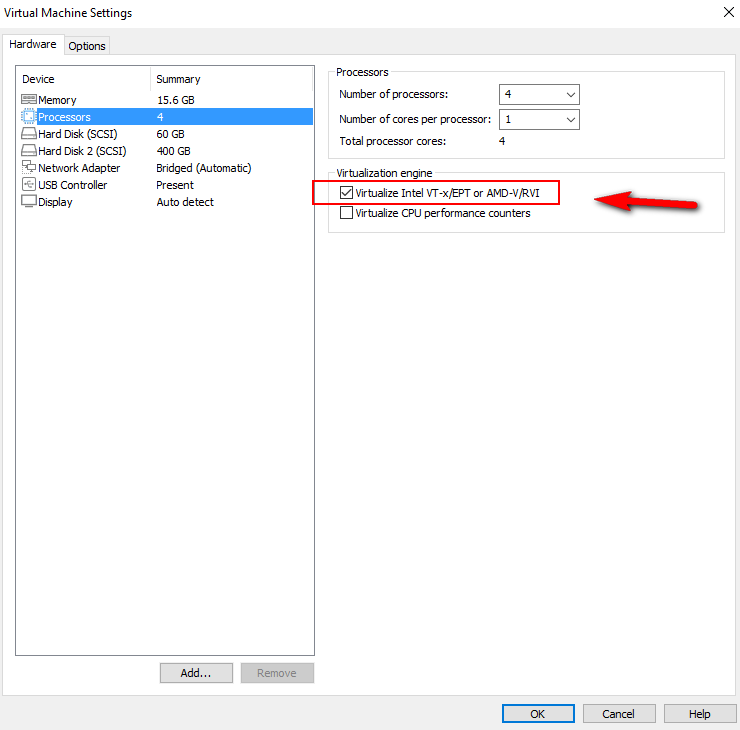
in most cases, you will see an error like the screenshot below.

virtualization technology enable on eve-ng

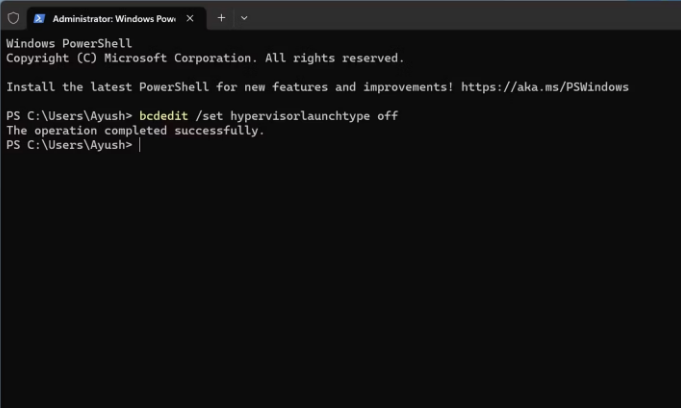
If you want a quick method to turn off Hyper-V without uninstalling it, you can run the BCDEdit command on Windows Terminal. Since BCDEdit allows you to modify the boot parameters for applications, you can use it to prevent Hyper-V from starting up every time you boot your system.

  1. Right-click on the Windows button and choose Terminal (Admin).
  2. Grant administrator privileges to Terminal when prompted by Windows
  3. Type the following command and hit the Enter key.
  4. bcdedit /set hypervisorlaunchtype off
virtualization technology enable on eve-ng

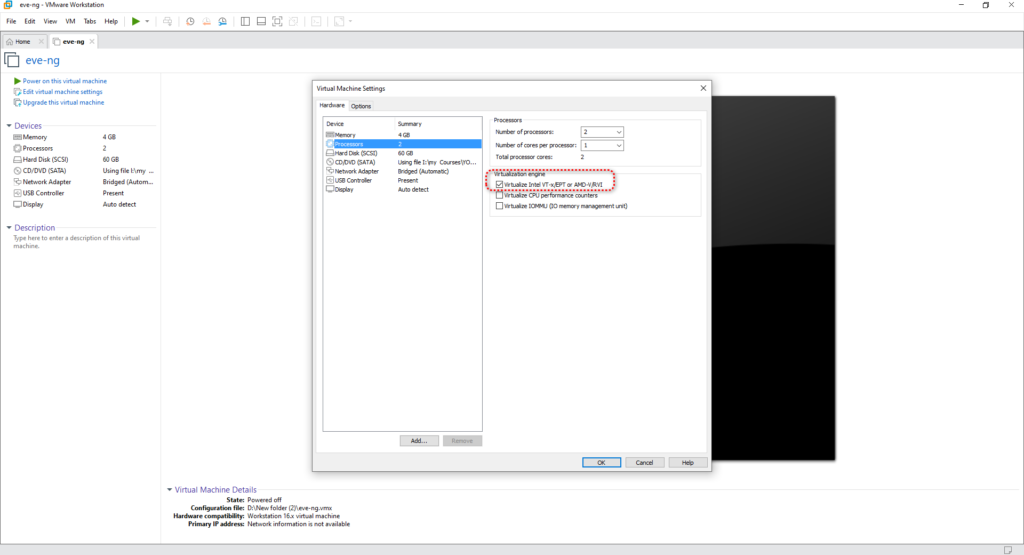
Then reboot your PC; next, make sure the below option in your eve-ng VM is ticked (double check) and try to boot your eve-ng VM. This time, you shouldn’t see the error.

visualization on eve-ng vm

Second Method:

 For Windows 11, you should allow Virtualization in BIOS, but you also have to go into Windows Features and manually disable security features prohibiting Virtualization. You have to „untick“

1. Go to Control Panel → Programs → Enable or disable Windows features.
2. Uncheck all the features of Windows Hypervisor.
3. In the Windows search bar, search for “core isolation” and open it.  
4. In the core isolation settings, disable memory integrity.

You can find the details on this link.  How to disable Hyper-V on Windows for BlueStacks 4 – BlueStacks Support

How to know Virtualization is enabled on EVE-NG with Putty

SSh to eve-ng with putty and use the below command

grep -cw vmx /proc/cpuinfo

if the Output is Zero, it means virtualization is not enabled (screenshot1). If it is more than Zero (screenshot 2), it means virtualization is enabled.

Note: if it’s Zero, you need to shutdown your PC and enable virtualization on your Bios PC or Laptop.

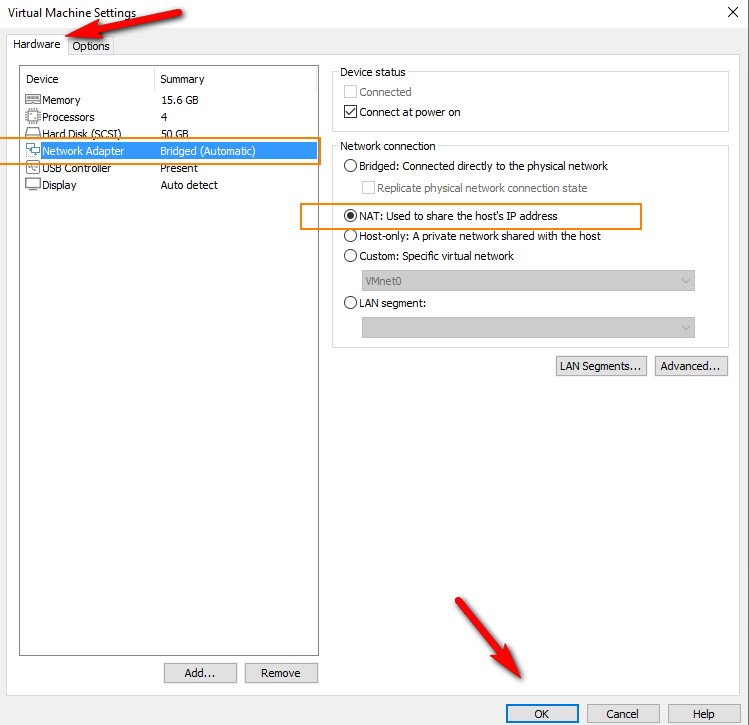
What EVE-NG network setting should I use in case of a WIFI adapter in my computer?

You need to select the NAT option in the EVE-NG VM Network setting 👇

VMware Workstation
Use the below setting for MAC OS WIFI adapter 
VMware Fusion
How to solve VMware fusion does not support virtualized performance counter on this host?

Resolve:
go to the menu “Virtual Machine” -> settings -> Processors & Memory -> open Advanced options and then make sure the following checkboxes are unchecked:👇

Enable Hypervisor applications in this virtual machine
Enable code profiling applications in this virtual machine

For more information visit this link

How To upgrade EVE-NG Full Pack to a Pro Version

For some reason, maybe you can’t upgrade to the eve-ng pro, don’t worry; you can download all qemu images from this path –> /opt/netlabel/addons/qemu/ and copy all images with Filezilla or WinSCP client and upload all images to the existing eve-ng pro. For more information, please watch the two videos on how to download and upload images from the eve-ng full pack.

How to upgrade EVE Community to EVE Professional

eve-ng official website article

If you need to upgrade your eve-ng community (full pack) version to the pro version!

Please see the link below

link

Here are the steps, as per the link above you need to go to this path in your eve-ng full pack using Filezilla or WinScp: /opt/unetlab and then copy these three folders into your computer (the paths mentioned in the screenshot) and then you need to install the fresh eve-ng pro and after you have licensed it, copy all these three folders in the same directory from your computer to the eve-ng pro –> /opt/unetlab (screenshot below)

Then there will be one step, you need to generate iol license for your iol nodes like the instruction below
IOL images stop immediately after few seconds!
  • First, you can select other images from the image box when you edit the router or switch (R1, R2…); please see the screenshot below.
  • Second, Although we have generated a licence for the IOL nodes in the eve-ng full pack in some cases, you need to generate a new licence to make those nodes start normally. If you need to know how to generate a new licence, please watch the below video.

How to generate a license for IOL nodes in EVE-NG?

Alternatively, download the above file, then extract it, and copy the extracted two files in the /opt/unetlab/addons/iol directory by FileZilla or WinSCP and then go to eve-ng (pro) shell console and go to the same directory by ” cd /opt/unetlab/addons/iol and apply the fix permission command. 

/opt/unetlab/wrappers/unl_wrapper -a fixpermissions

How to activate Fortinet VM Trial on FortiCare
Start Your CCNA Journey Today!

Wait! Don’t miss out on your Free Resources!

Minutes
Seconds

Welcome back!

Sign in to your account